The Base Model
A quick search on Amazon showed us this beauty:
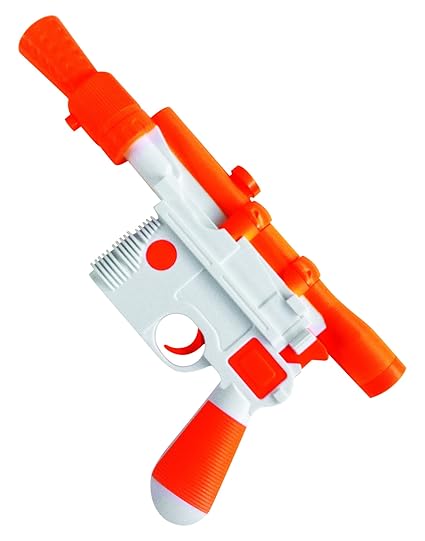 |
| Photo from Amazon |
At the time it cost me under $10 US plus shipping. Interestingly, if you check the comments, it looks like the only people who buy it are doing so to turn them into props!
Prep Work
The next step was to find a bunch of reference photos. Here's some of the ones that I found:
- https://www.outdoorhub.com/news/2015/12/14/video-jerry-miculek-shoots-han-solos-dl-44-blaster/
- https://www.youtube.com/watch?v=s6EQQnkUGIk
- https://www.reddit.com/r/pics/comments/28ka6a/han_solos_dl44_heavy_blaster/
- https://imgur.com/r/gunporn/1jI7M6O
- http://www.armslist.com/posts/4223492/knoxville-tennessee-antiques-for-sale--dl-44-han-solo-blaster--7-63-x-25mm-
- https://io9.gizmodo.com/this-may-be-the-most-accurate-han-solo-blaster-replica-1794231172 Now that I'm trying to re-find these source images, this site has an amazing bunch of photos!
Also, I need to point out that this video by HappyTrooper was very helpful for some of the prep work and a couple of techniques: https://www.youtube.com/watch?v=KVkijEZ-EZI
Watching that video, I learned that the muzzle end cap could be removed. So I did that and then drilled out the vent holes, starting with a pin vise bit to center each hole and worked progressively upward to an 1/8" bit with an electric drill:
Watching that video, I learned that the muzzle end cap could be removed. So I did that and then drilled out the vent holes, starting with a pin vise bit to center each hole and worked progressively upward to an 1/8" bit with an electric drill:

Since I didn't want to bore out or rebuild the scope, I measured each end and had a friend 3D print a couple of scope bezels:

The rear bezel is 30mm O.D., 26mm I.D., and 2.5mm thick. The front bezel is 23.3mm O.D., 20.3mm I.D., and 3mm thick. Since the scope is superimposed on the muzzle, I had to cut it to fit. I also cut a couple of slots in it to match the real scope used.
After gluing on the bezels, scraping off manufacturer marks, filling screw holes and part lines, I sanded everything flush as needed:

The next step was to hit it with a coat of black primer:
You can see I also started masking off the grip.
Weathering
Now to start weathering!
Since the original scope is made from brass—and if you've seen the new Solo movie, you can catch glimpses of gold—I decided to weather it with Privateer Press Formula P3 - Brass Balls:
Weathering
Now to start weathering!
Since the original scope is made from brass—and if you've seen the new Solo movie, you can catch glimpses of gold—I decided to weather it with Privateer Press Formula P3 - Brass Balls:

Checking the reference photos, it appears the grip is made from a reddish wood. So I basecoated it in Reaper Master Series HD Paints - Sunburn Flesh (29821), painting in the direction of the "grain" and making sure a little bit of the black showed through. Then I painted on some additional grain lines with Reaper Master Series Paints - Mahogany Brown (09070):

It doesn't show it here, but now's the best time to describe it. I wanted to knock back those grain lines a bit and make the grip a bit redder, so I used the same Reaper Mahogany Brown and glazed it. Glazing is a fancy word for diluting the paint with water and brushing it on so it puts a transparent film over the other colors. In this case I diluted it 1:1 and did one pass. After that, I did a quick drybrush with a more yellowish brown, Reaper Master Series Paints - Harvest Brown (09200) to make it look a bit worn.
Next, I masked off everything but the muzzle. I wanted the muzzle to look like it had seen some heat and grime, so I used (and happened to have) three different metallic spray paints. First, I basecoated the muzzle in silver. While it was still damp, I then hit the rear parts with a warm bronze, then I touched up the fronts with some gunmetal. Lookin' sweet!:
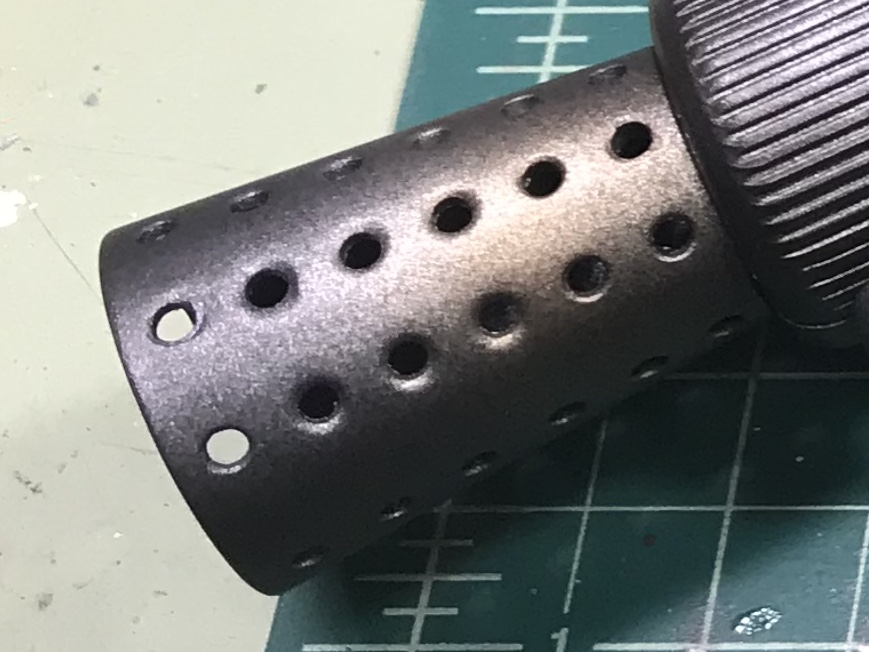 |
| My wife saw this step and said, "Neat! Carbon scoring!" |
At this point, I sealed everything with Army Painter "Anti-Shine" Matte Varnish.
One of the things I caught in HappyTrooper's video was using graphite to give the prop a gunmetal look. I happened to have a jar of Secret Weapon Miniatures Metallic Iron pigment and gave that a try. On a whim, I put a nylon brush in my Dremel and gave it a gentle buffing. It turned out really great:

Unfortunately..... putting on a coat of Krylon satin enamel made the look disappear. Bummer.
Well, push forward on the weathering!
I am fortunate to still have a bottle of Citadel's old Mithril Silver and Chainmail acrylics. (If anybody has a good suggestion for replacing these in the future, hit the comments below!) Using these two, I carefully silvered the various edges, following the various reference photos.
At this point, I also dirtied up the grip and muzzle with some slightly thinned Reaper Master Series Paints - Pure Black (09037) acrylic, mashed it in to the nooks and crannies, and wiped much of it off with a paper towel:

One more coat of Krylon satin enamel and we're almost done.
Since I wanted the scope to look like glass, I stood the prop on end, poured a couple of drops of Vallejo Game Varnish - Gloss (72072), and let it sit overnight:

You may have noticed the crosshairs... Before I glued on the bezel, I scribed the crosshairs in with a dental pick. Before I glossed it over, I painted the lines in with Reaper Master Series Paints - Pure White (09030) acrylic, then followed that with a Delta Ceramcoat neon green.
Since I wanted to get the feel of different materials, I decided to use a couple of different finishes. First sprayed the muzzle matte again, adding a quick pass across the grips to flatten them down a bit too. I also sprayed the scope satin a second time to kick up the sheen. Then I touched up the rest with Vallejo clear varnishes—a less satiny body, the matte mounting bracket, etc.
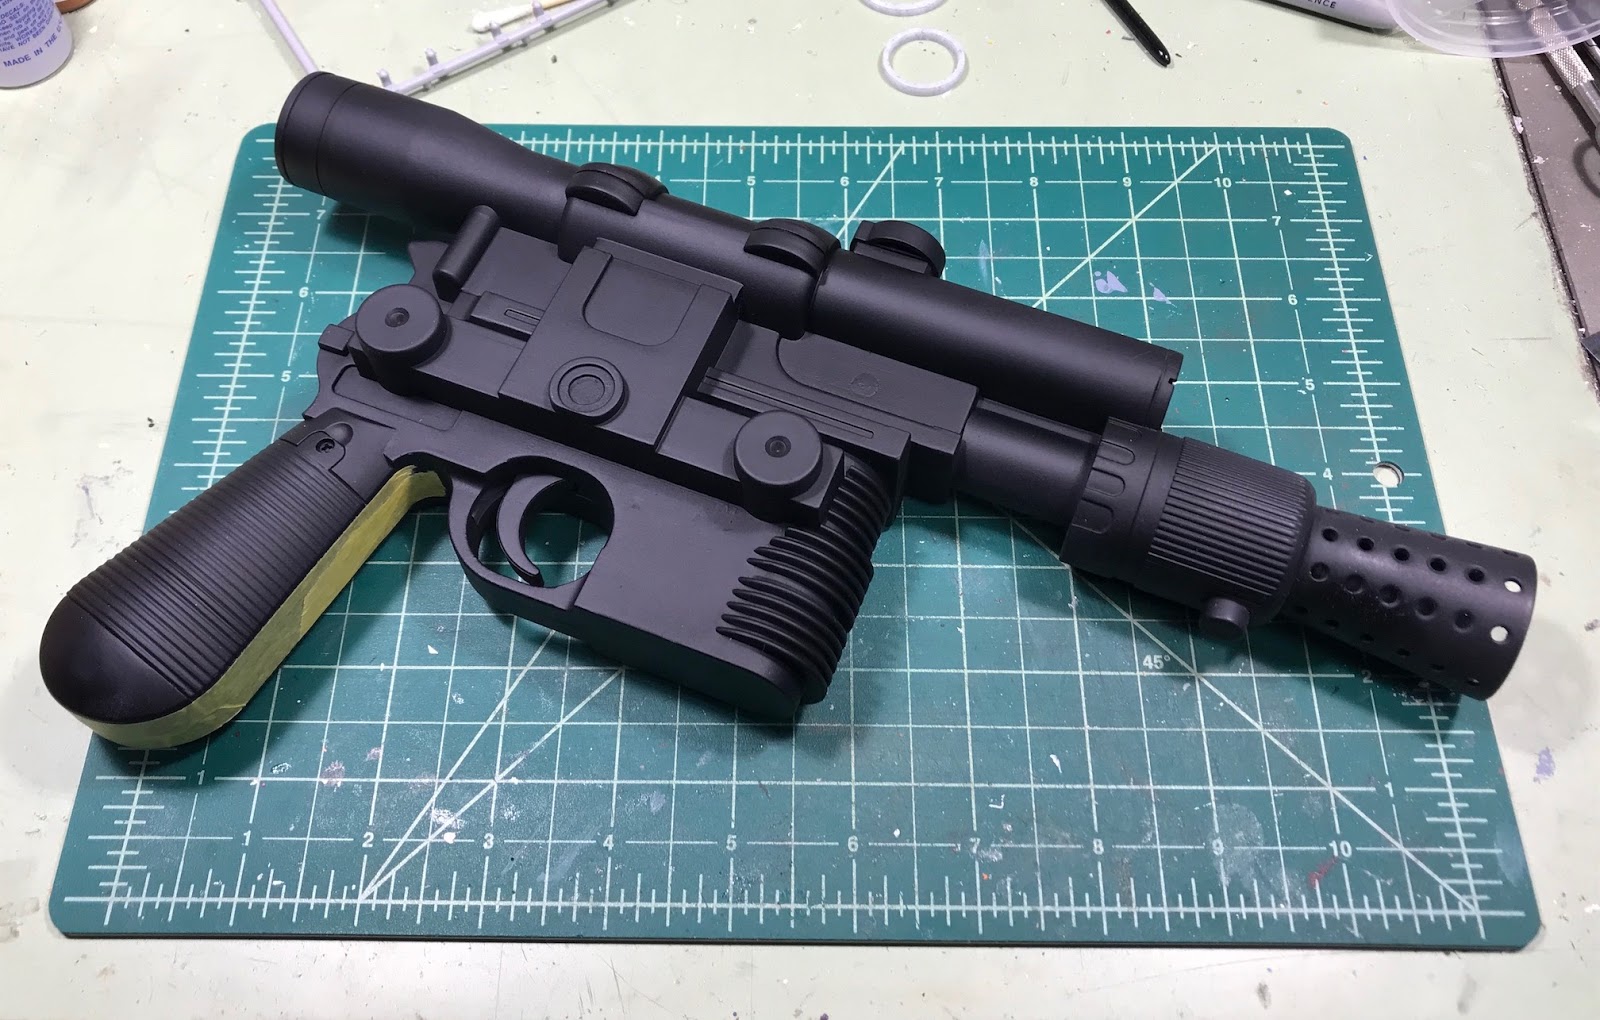
The Finished Product!

 |
| That silver medallion took way to long to get the brushed steel look, and you can't even see it in this photo! |

No comments:
Post a Comment