Showing posts with label Modeling. Show all posts

Wednesday, June 13, 2018

Making a Prop Han Solo's DL-44 Blaster from a Cheap Toy

If you've been following, you know my wife is with the Aurora 88s Roller Derby team. Her derby name is Hannah Solo, so for this year's photo shoot, we thought it would only make sense if she was holding Solo's DL-44 Heavy Plaster Pistol.

The Base Model

A quick search on Amazon showed us this beauty:

Photo from Amazon

At the time it cost me under $10 US plus shipping. Interestingly, if you check the comments, it looks like the only people who buy it are doing so to turn them into props!

Prep Work

The next step was to find a bunch of reference photos. Here's some of the ones that I found:
Also, I need to point out that this video by HappyTrooper was very helpful for some of the prep work and a couple of techniques: https://www.youtube.com/watch?v=KVkijEZ-EZI

Watching that video, I learned that the muzzle end cap could be removed. So I did that and then drilled out the vent holes, starting with a pin vise bit to center each hole and worked progressively upward to an 1/8" bit with an electric drill:


Since I didn't want to bore out or rebuild the scope, I measured each end and had a friend 3D print a couple of scope bezels:


The rear bezel is 30mm O.D., 26mm I.D., and 2.5mm thick. The front bezel is 23.3mm O.D., 20.3mm I.D., and 3mm thick. Since the scope is superimposed on the muzzle, I had to cut it to fit. I also cut a couple of slots in it to match the real scope used.

After gluing on the bezels, scraping off manufacturer marks, filling screw holes and part lines, I sanded everything flush as needed:


The next step was to hit it with a coat of black primer:
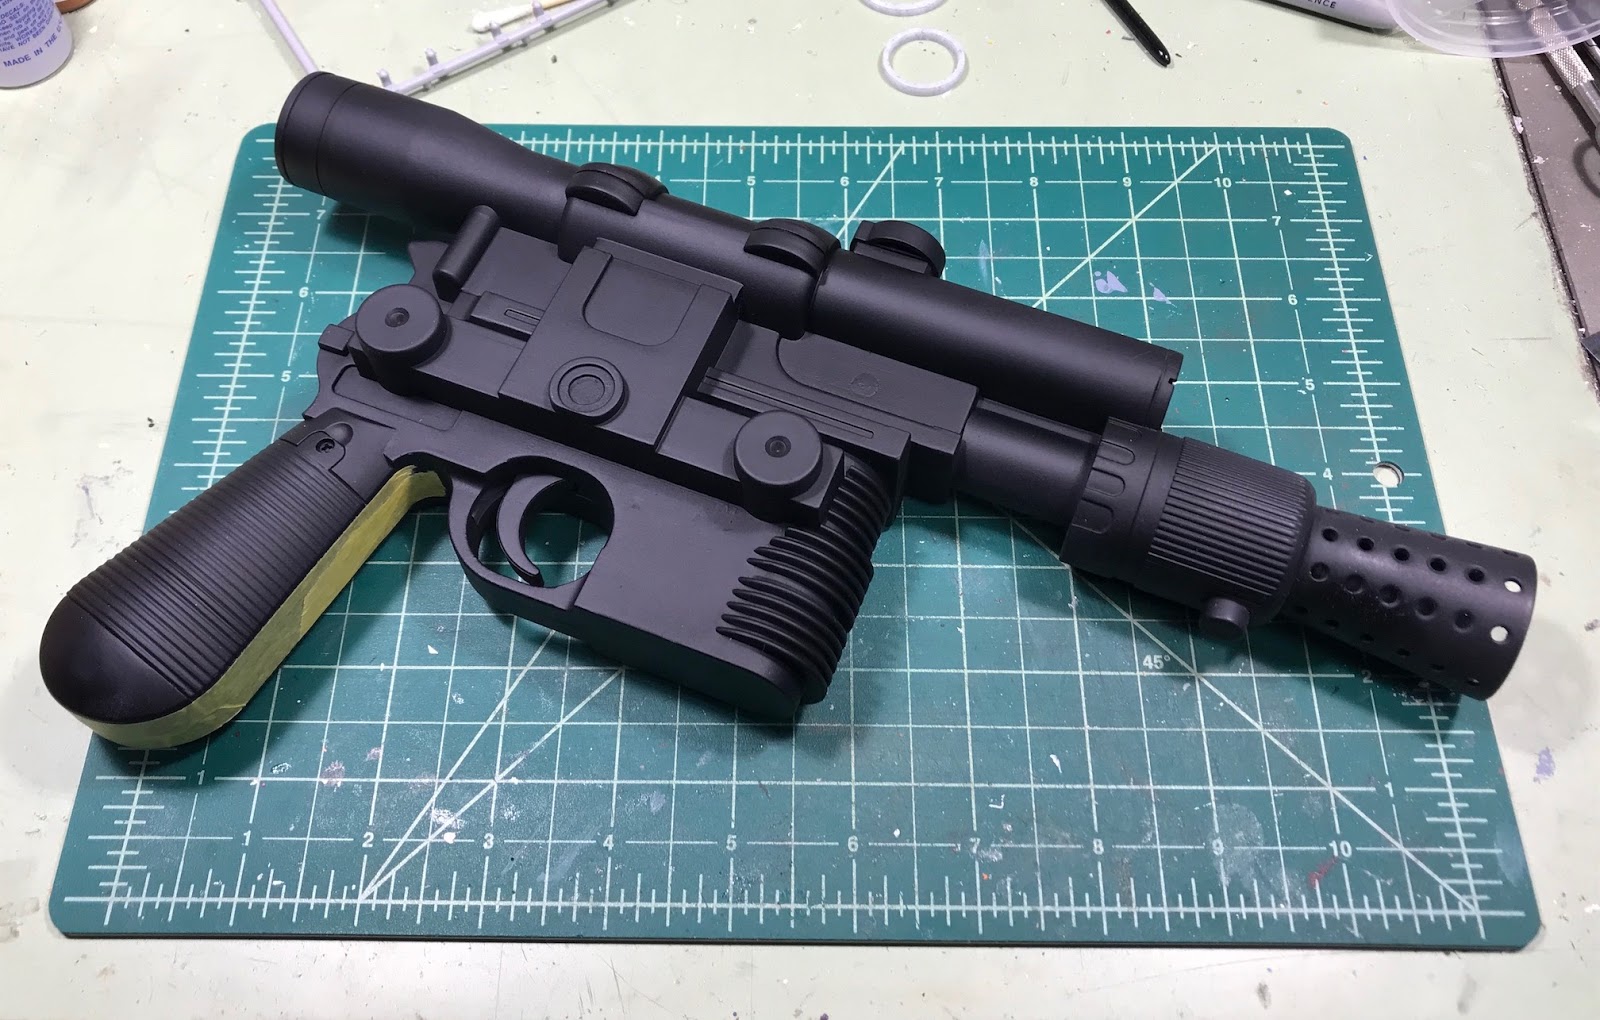

You can see I also started masking off the grip.

Weathering

Now to start weathering!

Since the original scope is made from brass—and if you've seen the new Solo movie, you can catch glimpses of gold—I decided to weather it with Privateer Press Formula P3 - Brass Balls:


Checking the reference photos, it appears the grip is made from a reddish wood. So I basecoated it in Reaper Master Series HD Paints - Sunburn Flesh (29821), painting in the direction of the "grain" and making sure a little bit of the black showed through. Then I painted on some additional grain lines with Reaper Master Series Paints - Mahogany Brown (09070):


It doesn't show it here, but now's the best time to describe it. I wanted to knock back those grain lines a bit and make the grip a bit redder, so I used the same Reaper Mahogany Brown and glazed it. Glazing is a fancy word for diluting the paint with water and brushing it on so it puts a transparent film over the other colors. In this case I diluted it 1:1 and did one pass. After that, I did a quick drybrush with a more yellowish brown, Reaper Master Series Paints - Harvest Brown (09200) to make it look a bit worn.

Next, I masked off everything but the muzzle. I wanted the muzzle to look like it had seen some heat and grime, so I used (and happened to have) three different metallic spray paints. First, I basecoated the muzzle in silver. While it was still damp, I then hit the rear parts with a warm bronze, then I touched up the fronts with some gunmetal. Lookin' sweet!:
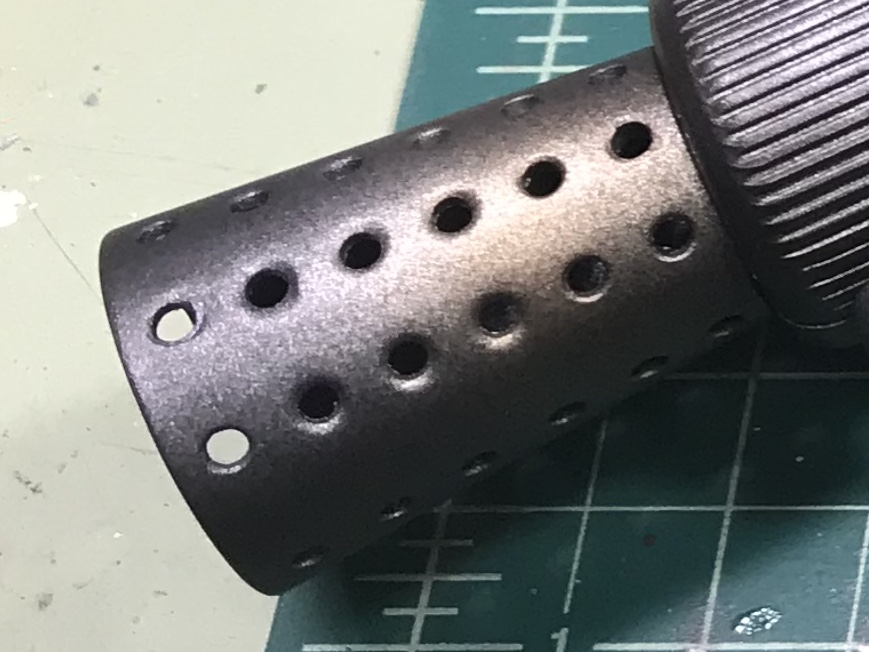
My wife saw this step and said, "Neat! Carbon scoring!"

At this point, I sealed everything with Army Painter "Anti-Shine" Matte Varnish.

One of the things I caught in HappyTrooper's video was using graphite to give the prop a gunmetal look. I happened to have a jar of Secret Weapon Miniatures Metallic Iron pigment and gave that a try. On a whim, I put a nylon brush in my Dremel and gave it a gentle buffing. It turned out really great:


Unfortunately..... putting on a coat of Krylon satin enamel made the look disappear. Bummer.

Well, push forward on the weathering!

I am fortunate to still have a bottle of Citadel's old Mithril Silver and Chainmail acrylics. (If anybody has a good suggestion for replacing these in the future, hit the comments below!) Using these two, I carefully silvered the various edges, following the various reference photos.

At this point, I also dirtied up the grip and muzzle with some slightly thinned Reaper Master Series Paints - Pure Black (09037) acrylic, mashed it in to the nooks and crannies, and wiped much of it off with a paper towel:


One more coat of Krylon satin enamel and we're almost done.

Since I wanted the scope to look like glass, I stood the prop on end, poured a couple of drops of Vallejo Game Varnish - Gloss (72072), and let it sit overnight:


You may have noticed the crosshairs... Before I glued on the bezel, I scribed the crosshairs in with a dental pick. Before I glossed it over, I painted the lines in with Reaper Master Series Paints - Pure White (09030) acrylic, then followed that with a Delta Ceramcoat neon green.

Since I wanted to get the feel of different materials, I decided to use a couple of different finishes. First sprayed the muzzle matte again, adding a quick pass across the grips to flatten them down a bit too. I also sprayed the scope satin a second time to kick up the sheen. Then I touched up the rest with Vallejo clear varnishes—a less satiny body, the matte mounting bracket, etc.

The Finished Product!


That silver medallion took way to long to get the brushed steel look, and you can't even see it in this photo!

Hannah's pretty happy with the way it turned out!:

Photo by Cloud Photo


Thursday, March 8, 2018

"I want a HORROR chainsaw!"

My wife is currently a member of the Aurora 88s Roller Derby team. Every year, they have a "FunD Skate" in which they do raffles, a silent auction, and other activities in order to generate some funds for the coming year. The silent auction is usually a series of themed gift baskets. This year the auction included a "Horror Basket". She hands me a plastic chainsaw Christmas ornament she picked up sometime during the holidays and says, "Could you paint this like a horror chainsaw?"

This is what she handed me:

https://www.ebay.com/itm/282731062165
As I'm writing this, you can still get them on eBay from this seller.

"Sure! I'll knock that out in no time."

I scraped off the silver glitter, masked it off leaving just the blade, hit it with a couple of passes of silver Krylon spray paint, and painted some blood effects on it with some red ink mixed with gloss medium. Done! Easy-peasy!

Done! Easy-peasy!
I hand it back to her, and she says, "That's nice... but I was hoping for more guts hanging off the blade and stuff. I want a horror chainsaw."

"Sure, I can use some glue to build it up some..."

"I know what you're capable of! I want a HORROR chainsaw!"

I don't watch a lot of horror flicks, so I'm missing something. "Um..."

"Like the chainsaw from 'Texas Chainsaw Massacre'..."

Those were the magic words I needed to hear. A quick Google search produces THIS IMAGE.

Now I know what I'm aiming for!

I head back to my cave and get back to work:
  • Scraped off the remaining glitter. (This should have been a clue...)
  • Found an old can of gunmetal colored spray paint and painted the whole thing, wiping off some of the fresh paint to reveal the orange plastic below.
  • Painted the handles with flat black enamel paint.
  • Tore thin strips of duct tape and wrapped parts of the handles.
  • Weathered the whole thing with diluted black enamel and acrylic paints.
  • Made the gore texture with 5-minute epoxy, very thin strips of plastic bag from a dry cleaner (for translucent stringy stuff), and a tiny bit of Secret Weapon Rust Red pigment.
That got me to here:


A couple more rounds of "gore mix" and a couple of passes of the red ink and gloss medium, and voila!


This made her much happier!

And we'd like to think the winning bidder is happy with the result as well!


Tuesday, August 2, 2016

Modding and Painting Secret Weapon Miniatures' Traffic Pylons

I believe it was Adepticon where I first saw and picked up Secret Weapon Miniatures' Traffic Pylons. They come 10 to a pack and are beautifully cast out of resin. The master appears to have been a 3-D printed model as there is some minimal texture to the casts. The only bit of flash appeared to be at the top of the pylon. And so, I dutifully started cutting and filing them off. I had gotten through eight of them before I realized, "Hey, waitaminute! Aren't there supposed to be handles on these things?!?" So off to google image search to see what they look like in real life...
Side note: if you do a Google Image Search yourself, use 'traffic barrel' or 'construction barrel', otherwise, you'll end up with a ton of pictures of traffic CONES.
Well, look at that! Those little ridges are supposed to represent the handles. Well, since I shaved most of them off, and I wanted better looking handles anyway, I had to remake them myself.

I had some 1mm X 2mm styrene strips on hand that would fit the bill. In order to make a solid connection joint, I would have to cut slots in the tops of the pylons for the styrene to fit in. I had already done the cleanup work, I just had to cut the slot with a razor saw and square file like so:


Once all the slots were cut, I:
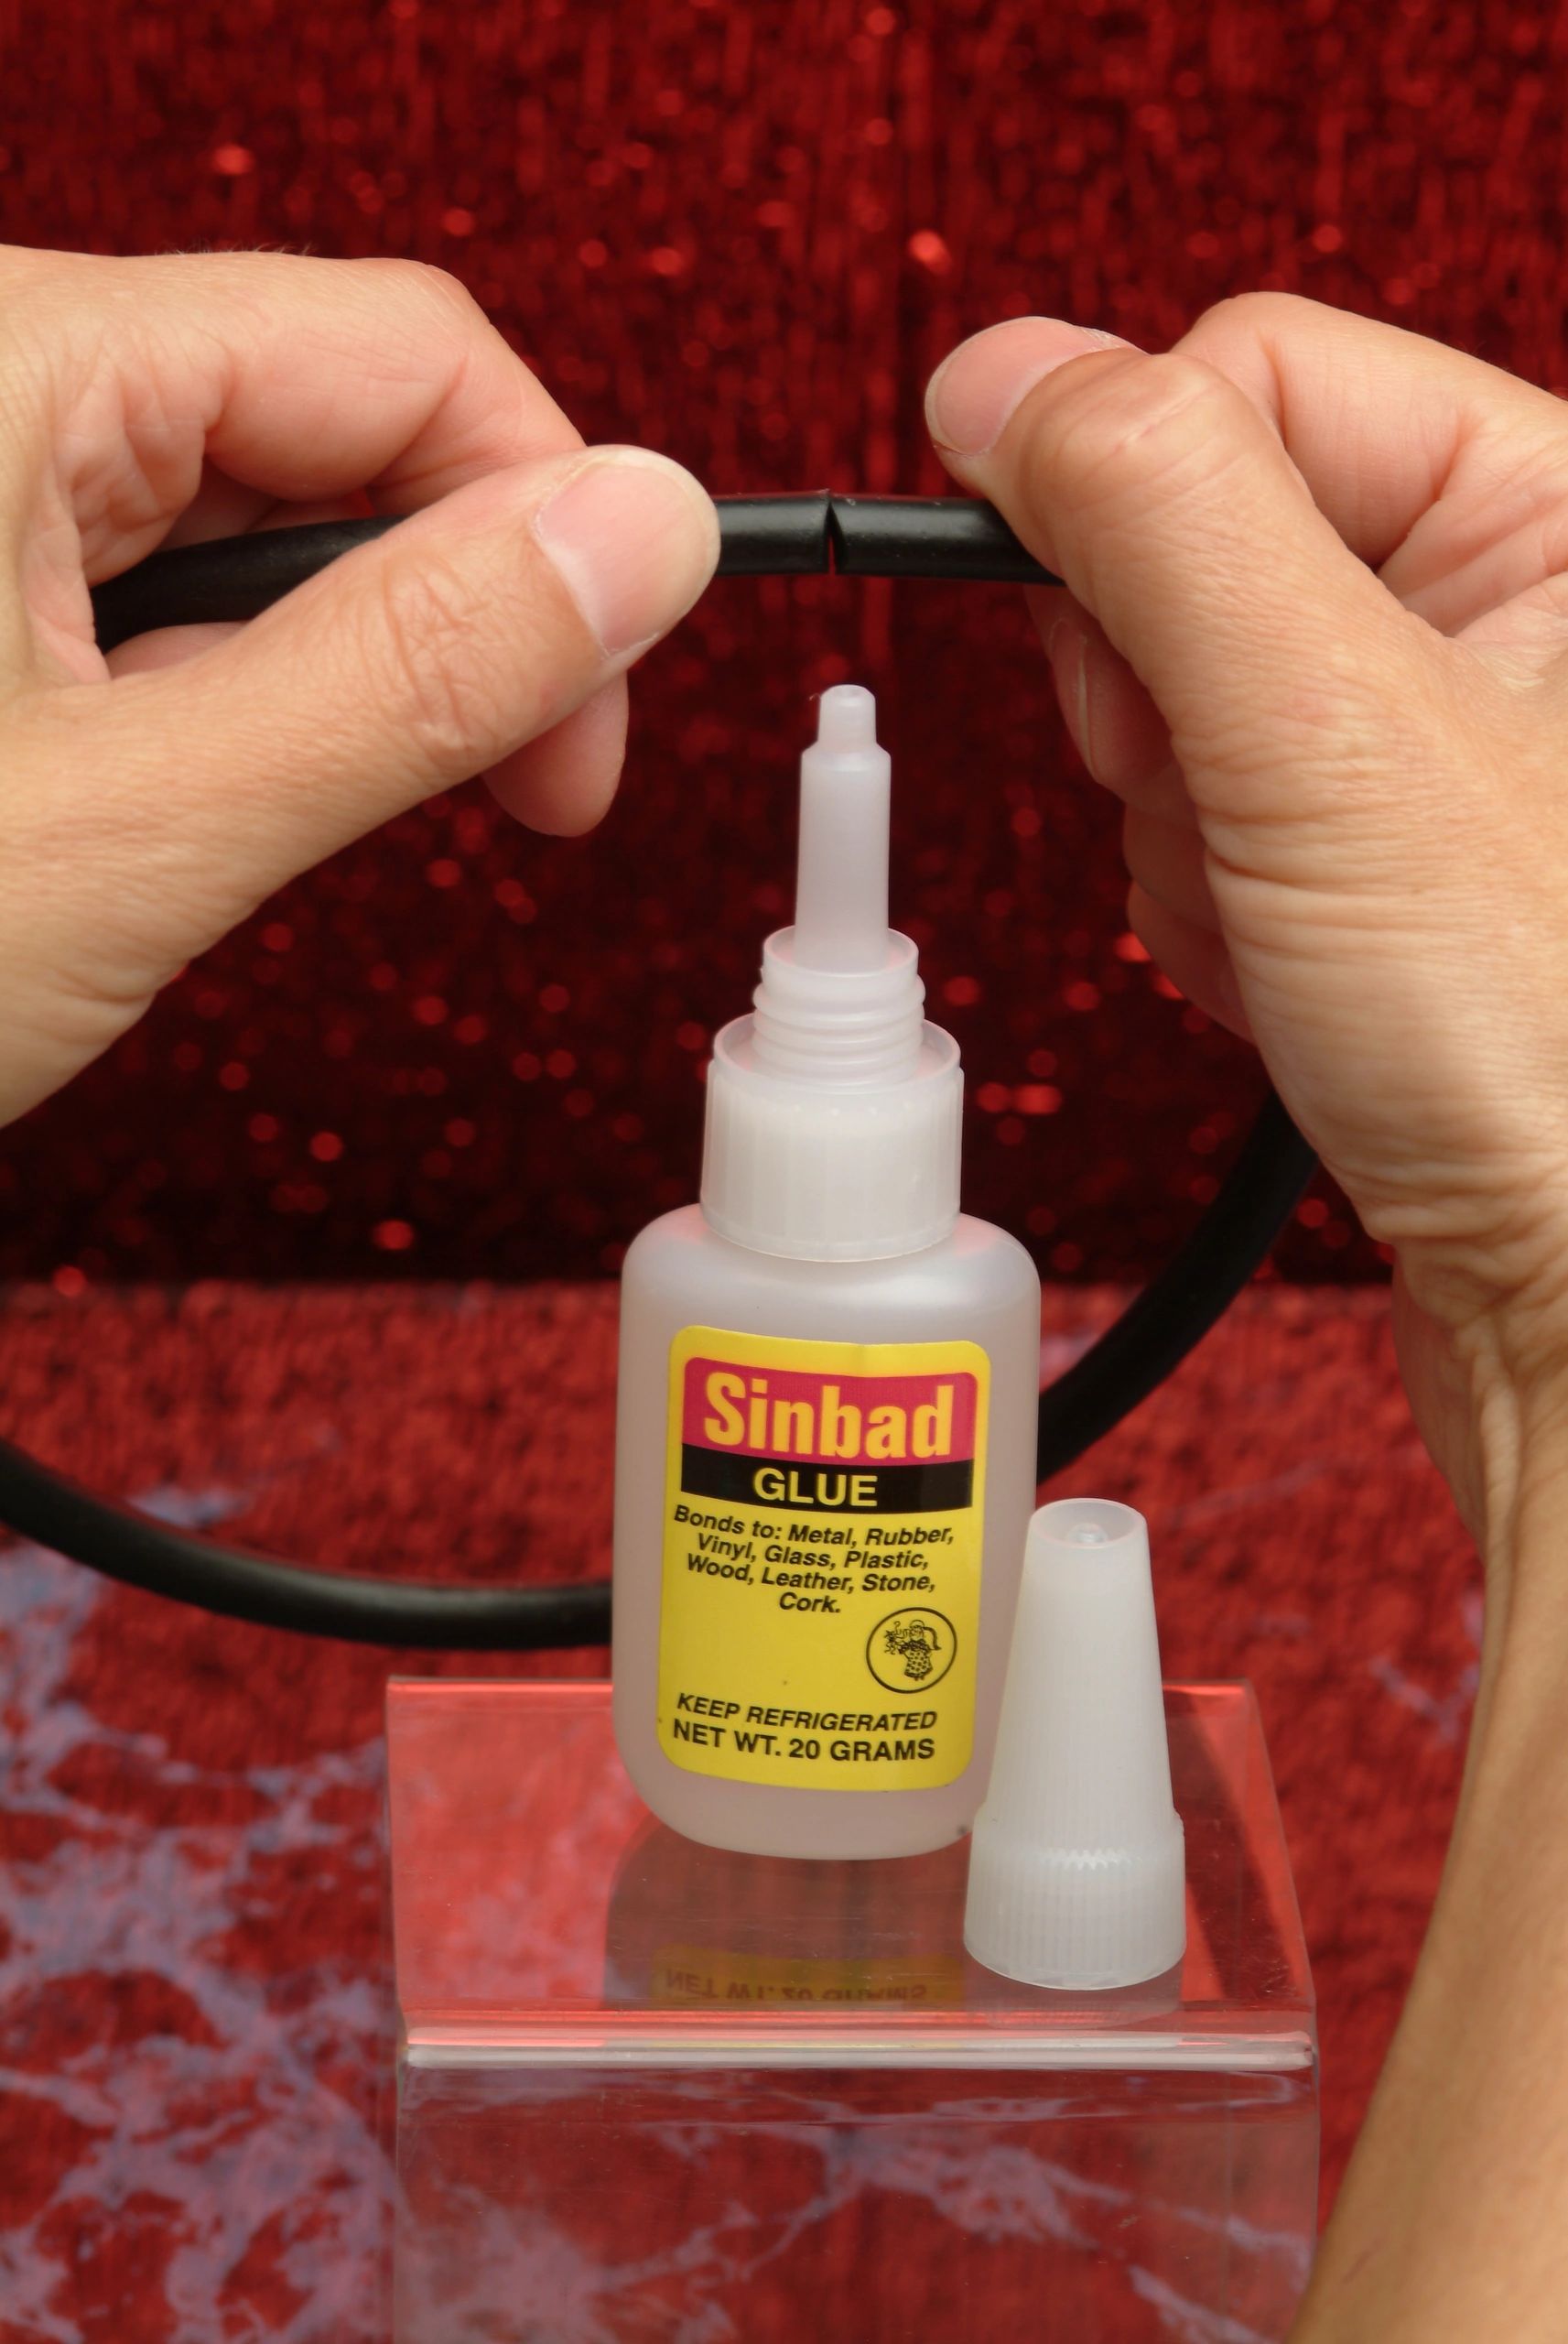
  1. Glued in the styrene strip with Sinbad Glue
  2. Chamfered the corners with some diagonal cutters
  3. Drilled three pilot holes with a pin vise drill
  4. Enlarged the holes with a larger bit
  5. Cleaned them up with a hobby knife
  6. Rounded the corners with a sanding block
You can see the progression here:


I did not drill holes that would be used to bolt a barricade light on as I felt it would weaken the styrene too much.

For the basecoat, I wanted to see if I could skip priming and go straight to a good 'construction barrel orange'. Fortunately, I found a can Rustoleum Fire Orange Satin Spray Paint that was perfect. I applied several coats to smooth over any remaining seams in the handles and to minimize the surface texture you get from casting a 3-D printed model.

Since the cones might get or be placed tipped over, I hit the bottom of them with a quick coat of black primer.

Then, since, in the real world, the stripes are actually stickers, I wanted some of the stripes to look like they were scratched and peeled off. So I separated the pylons into three groups – "new", "used", and "old and busted". I applied some Vallejo Liquid Mask to the last two groups to an appropriate degree:


You'll see that I was test-fitting screwing a computer motherboard standoff into the bottom of the pylons. Since I was going to be painting 40 stripes, I figured I would screw the standoff into the exact center of the pylons and use a cordless drill to slowly spin them so I could just hold a loaded brush in place and let the drill do the work.

I got it to work with quite a bit of trial and error, but I wouldn't recommend it. You have to get the pilot hole centered correctly and the standoff screwed in as straight as possible.

For the orange stripes, I used Reaper HD Fireball Orange (29806). For the white stripes, I used Reaper Pure White (09039). To simulate making it look like it was a reflective material, I liberally added Vallejo Metal Medium – probably 2:1 metal medium to base color. I also tweaked the orange stripe color with yellow and orange inks.

Here's the result with the mask peeled off:


Since the Rustoleum basecoat was slightly glossy, I couldn't use acrylic on the bases as it kept chipping off. I ended up busting out my trusty Testors Flat Black Enamel for the bases.

I saved my work with a quick coat of Testors Dullcote.

Now on to weathering.

If you do the Google Image Search, you will see that several of the recycled tire bases have faded over time. I simulated this by applying glazes of Reaper Splintered Bone (09273) in varying numbers of applications.

To dirty up the pylons themselves, I applied washes of Vallejo Black Wash and Secret Weapon Miniatures Armor Wash in varying degrees.

I then used a black china marker to simulate tire and asphalt scuffs, like so:


The next step was to splatter on small amounts of black paint with a toothbrush, to simulate splashes of tar.

That's probably where I should have stopped.

However, I decided I wanted to give them a filter of Testors Concrete Flat to make it look like they were coated in a film of concrete dust. Unfortunately, I think I went overboard with the airbrush:


Oh well, they look okay and will work perfectly well as tabletop terrain.

Friday, July 15, 2016

Avoid Compact Fluorescent Light Bulbs in Your Workspace

Are you using Compact Fluorescent Light (CFL) bulbs to light your miniature painting or model building workspace? Well, according Stony Brook University, you shouldn't be, as they are unhealthy for your skin.

According to a study Stony Brook did in 2012, CFLs emit ultraviolet (UV) radiation that causes damage to healthy skin cells. You can read about it here:
http://commcgi.cc.stonybrook.edu/am2/publish/General_University_News_2/SBU_Study_Reveals_Harmful_Effects_of_CFL_Bulbs_to_Skin.shtml

If you need more proof, here is some further reading:
Now, I will point out that most of the above references state that they see the biggest issue when working within a foot of the light source and say that generally being around CFLs is not a problem. But, my hands are usually less than two feet away, and I'm sure my big bald head gets some of that UV goodness.

I have since swapped out my two 100W daylight compact fluorescent bulbs for 100W equivalent daylight LED bulbs. They are just as bright and don't have the warmup time my old CFLs did.


Thursday, September 3, 2015

The Amazing Sinbad (Glue)!

Go ahead! Try to break that bond!
"Ladies and Gentlemen! Step right up and witness the one glue for bonding everything to everything else! Canvas! Cork! Glass! Leather! Metal! Rubber! Stone! Vinyl! Wood! You name it and this product will stick to it! And it will do it in 30 seconds flat! How strong is the bond you ask? Not only will it hold aloft a construction worker glued to a girder by his helmet, but he can be riding a motorcycle at the same time! That's right! It will hold up to 2000 pounds! And can you believe this miracle glue is non toxic?!? You there! Watch as I cut this vacuum cleaner belt and repair it with our wonder glue. Try to pull it apart....."

That's not exactly the pitch the salesperson used to get me to stop and look at Sinbad Glue, but it might as well have been. And it still would have been free of marketing lies and half-truths.

This sales pitch happened at the Sinbad Glue Corp. booth at Gen Con – the Google tells me it was 2006 – the only year that Sinbad Glue Corp. was at Gen Con. Fortunately, I happened to be there and happened to walk past their booth. It didn't take much for the woman to convince me this was a superior cyanoacrylate "super glue".

I have just purchased my fourth bottle.

For those of you familiar with "super glues" and good at math realize that I've had three bottles of CA glue in nine years, when it should have been a bottle of glue each year minimum, probably quadruple that. Honestly, I have tried several brands from the generic "super glues", to better quality glues, such as Gorilla Glue's version, to hobby CA glues, like Zap. Although some are decent glues, they all cured in the bottle once opened. I didn't even take the Gorilla Glue out of the package before it cured! If you check the wikipedia entry on cyanoacrylates (go ahead, interesting stuff), it says the shelf life of CA glue is about one year from manufacture, or 30 days once opened.

Sinbad Glue Corp. boasts that their cyanoacrylate has an incredibly long shelf life of 3 years, opened or not! I can attest to that statement – after all, I'm only on my fourth bottle! Further, they say if you store it in the refrigerator, it will last indefinitely.

As a side note, even the bottle design is clever! There is a steel pin in the cap that keeps the nozzle from clogging. If you keep the tip of the bottle clean, you shouldn't have a problem with the cap sticking, but they suggest applying their Sinbad Gloves product to the tip to prevent it altogether. More on that later.

But how's it work as a CA glue? Simply fantastic! Just as they claim, it will bond in about half a minute (less with their accelerator) and will bond pretty much anything. I use it for assembling tabletop miniatures of all materials. I'm sure there are some things it won't work on (maybe acrylic?), but I haven't found out which yet.

Here are some more facts from their website:
  • Shear strength of 1,000 lbs. after cured. 
  • Holds up to 2,000 lbs. 
  • Non-toxic. 
  • Dries clear. 
  • Waterproof.

By the way, it won't fog plastic. This is huge! If you've ever tried to glue clear plastic windows into a toy or model, you know that fogging is a legitimate concern.

Okay, so what's the downside? A 20 gram bottle of Sinbad Glue will cost $20 plus shipping & handling and is only available by calling them or direct from their website: http://sinbadglue.net
In their defense, they say, "It takes an average person 3 years to use up the glue." That may be true for someone doing regular household repairs, but after 3 years of gluing miniature arms and heads on, I only use about half a bottle. And sure enough, after that time it starts to get thick and stringy and loses some of its strength. So, I have to buy another bottle.

That's not to say it's not worth $1 a gram – it's worth every penny – I just wish I could buy it in 10 gram bottles so I wouldn't be tossing so much of it out.

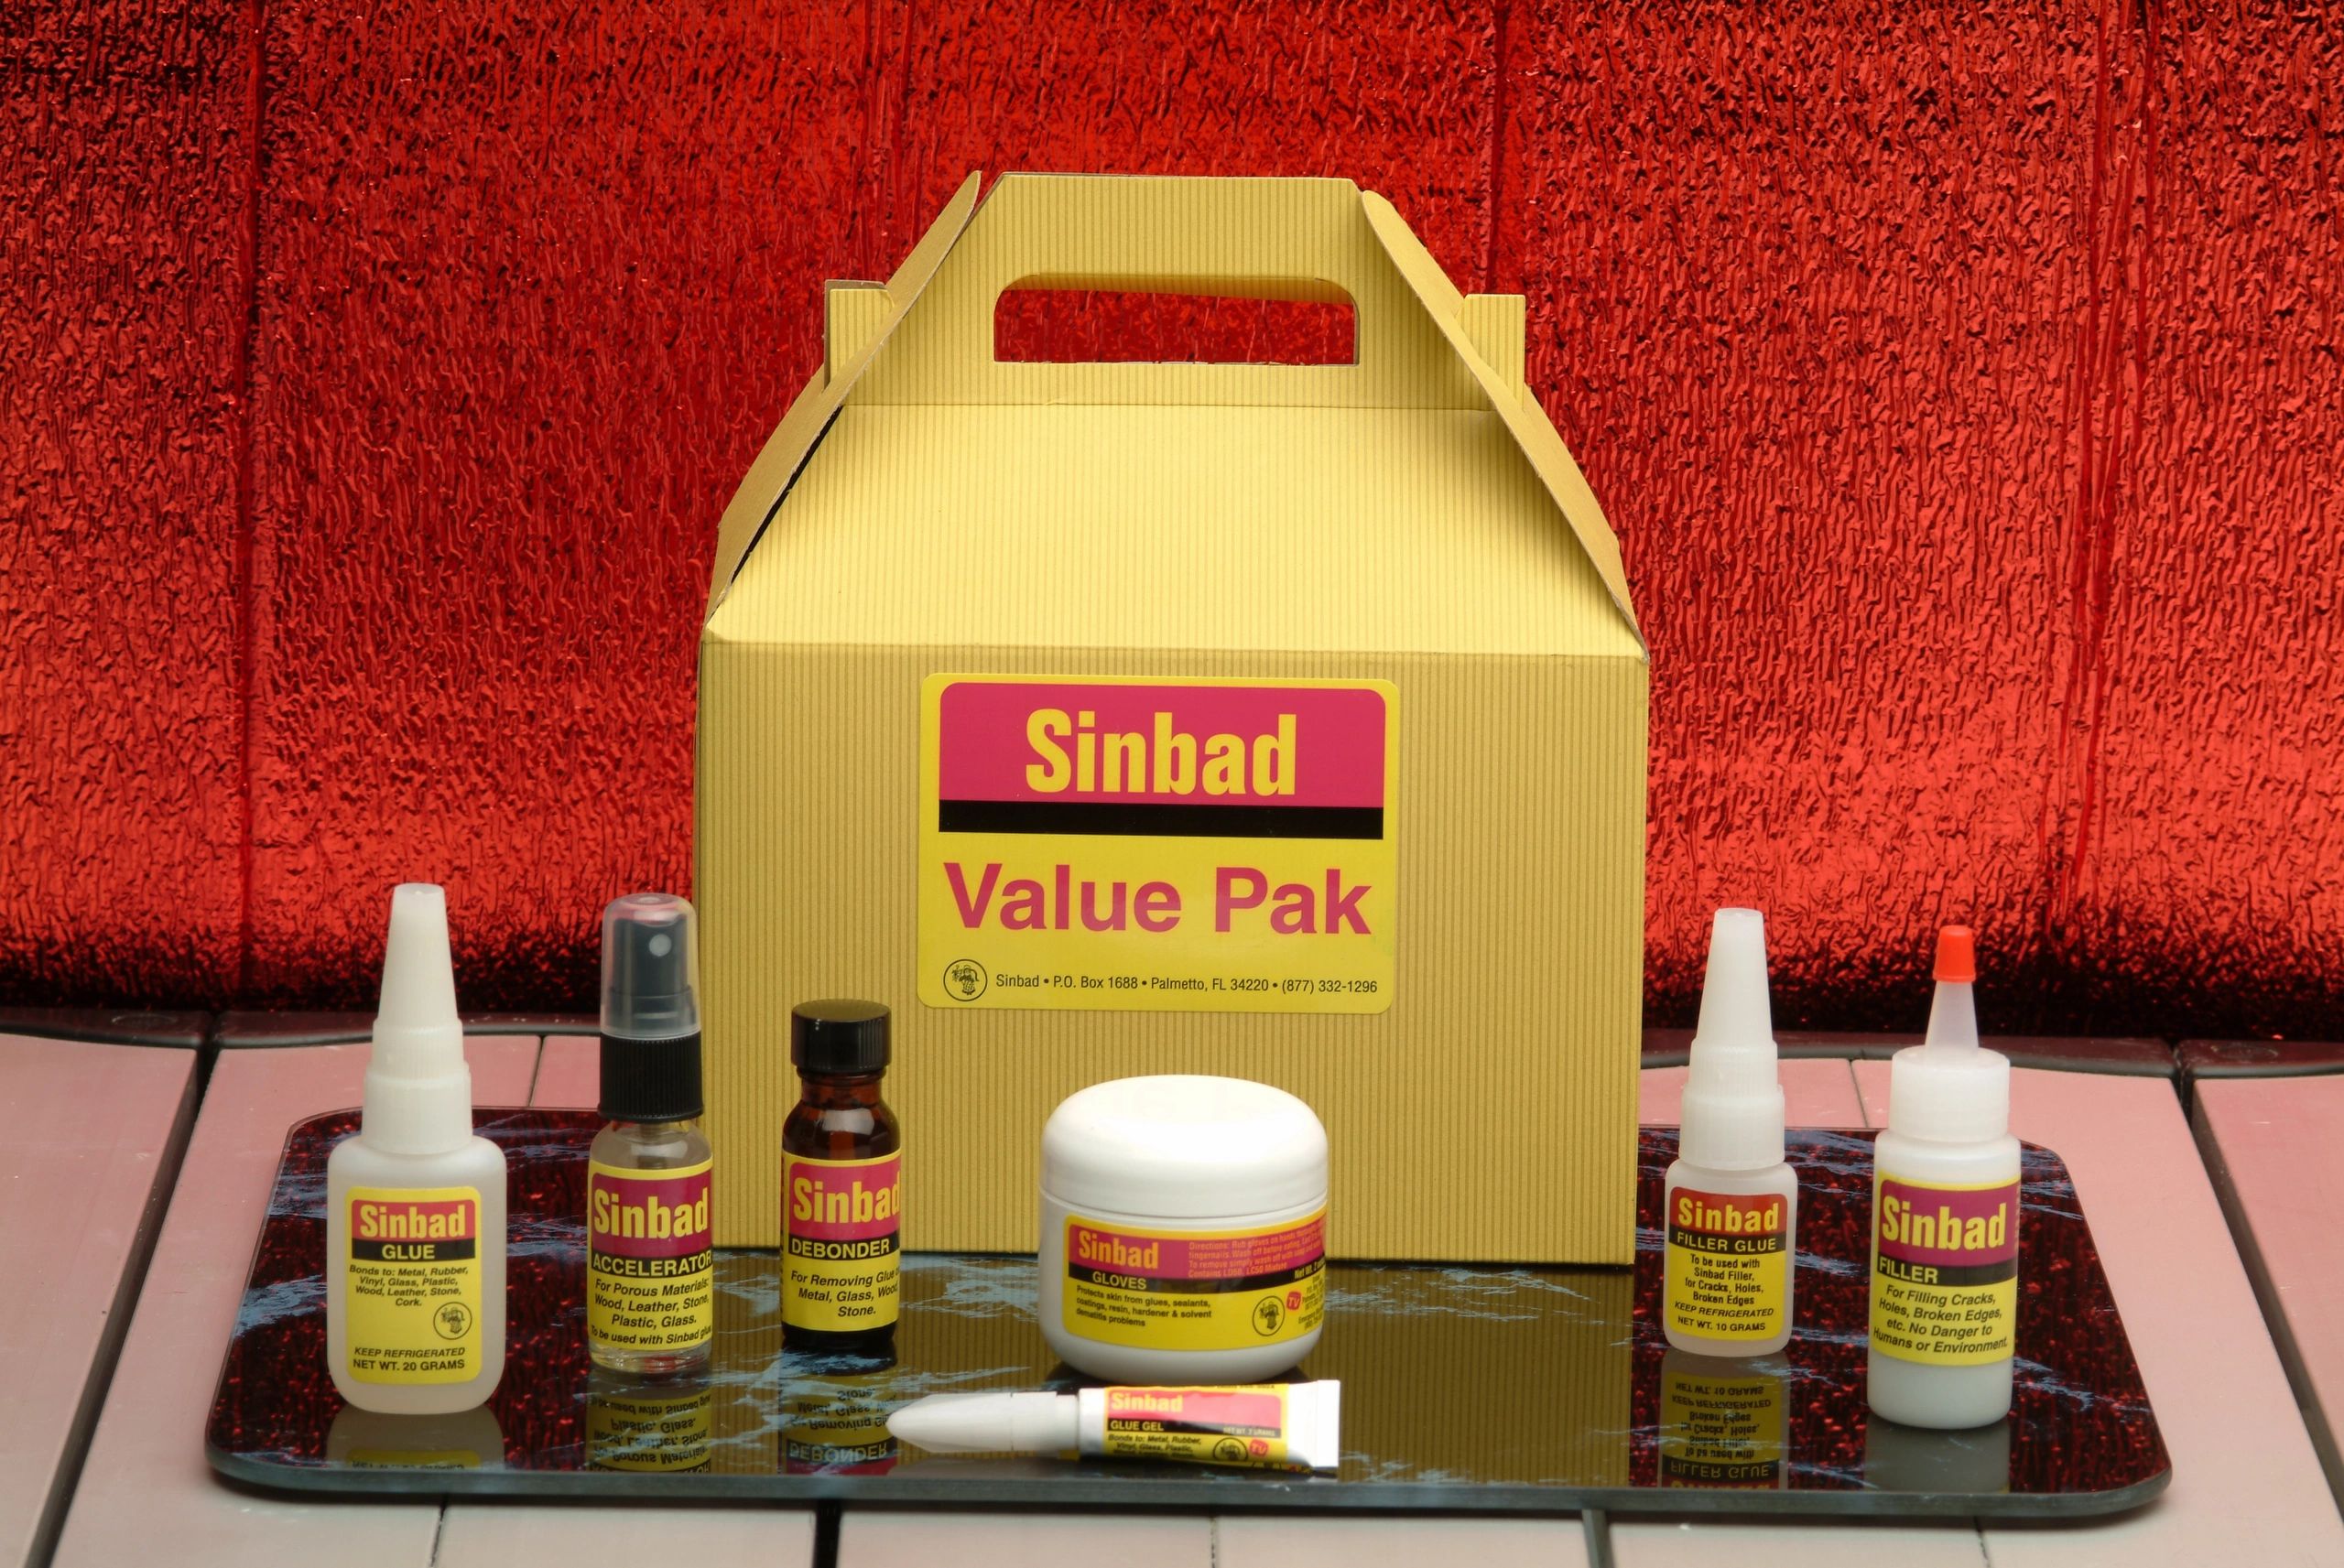
The "Value Pak"!
To get the best bang for your buck, they offer a "Value Pak" which includes their whole line of anything to do with cyanoacrylate glues:
  • 20 gram bottle of Sinbad Glue - The best CA glue you can buy!
  • 1/2 ounce bottle of Accelerator - The pump sprayer cap allows you to prep a surface for immediate bonding or to accelerate the glue bond while holding two items together.
  • 10 gram bottle of Sinbad Filler Glue - A very thin version of Sinbad Glue. The company intends you use it with the Sinbad Filler to seal leaks in pipes. I use it for flowing into hard to reach gaps and for stiffening cardstock and wood.
  • 1 ounce bottle of Sinbad Filler - Essentially glass micro-beads. You can use it as snow on miniature bases!
  • 2 gram tube of Sinbad Glue Gel - A thicker no-drip CA glue with a slightly longer working time. Has some gap-filling properties.
  • 1 ounce jar of Sinbad Gloves - A water-soluble cream that you are supposed to apply to your hands. Once dry, it prevents CA glue from sticking to the applied area. When done, simply wash it off. They also recommend coating the tips of your glue bottles with it to prevent the caps from sticking. In use, it feels kind of weird on your hands and I always forget to apply it anyway.
  • 1/2 ounce bottle of Debond - In case you do stick things together unintentionally, you can use the brush in the cap to apply it to the problem spot. It does say it takes two hours to work, tho...

So, there you have it – Sinbad Glue – my favorite cyanoacrylate glue of all time!

Feel free to ask me any questions in the comments.


Wednesday, September 21, 2011

Oil Rig Build Log - Part 5

It's been a while since I posted something, so here's a photo update. The miniatures are coming along nicely and we're experimenting with railings:


Thursday, April 28, 2011

Oil Rig Build Log - Part 4

As promised, here's the Oil Rig Build Log Update!

Pete cut 1" steps from some extruded polystyrene foam sheet insulation (otherwise known as "pink" or "blue foam"), glued them in place, and coated them with some left over household latex paint. The paint seals the foam so we can spray paint it. Without it, the propellant in the spray paint will dissolve the foam.

At this point, we're pretty much done with the playtest mockup. All we needed was a placeholder for the oil derrick. So, some scrap cardboard later, and voila!
To maintain overall proportion, we decided upon a 20" tall derrick.

Here you can see the scale of this project. Our stand-ins are a couple of PanOceania mins from Infinity.
(Check out those railings...)

Here's the PanO guys boarding a helo for a quick escape!

As I had mentioned, we planned on spray painting the rig to unify the appearance and hide the imperfections. Here's an action shot of Pete!

Four cans of cheap grey spray paint later and here's the finished product. Lookin' good!
That should suffice as far as usability for play testing!

Now on to the miniatures!

We had briefly discussed using the existing Infinity miniature line, but in a very specific scenario/terrain such as this, we figured we'd streamline the rules to minimize the complexity. As such, the mins weren't as important. That meant we could return to the concept of an SpecOps attacking force, and a "goon" defending force.

For the attackers, we found the Eureka Miniature line and really liked their NATO Special Forces Frogmen (this is the Eureka Miniatures USA link - they're based out of Australia). Here's what they look like cleaned up, their bases sawed off, and pinned:

For the defenders, after an exhaustive search, we settled on 'Guards in Hard Hats' from Copplestone Castings in their 1960's Characters line. I don't have a picture of them, so this will have to do:
We ordered 12 of them as we are assuming the defenders will be at a disadvantage, so a 2 to 1 numerical advantage should help.

Just a cool picture Pete took showing the scale of the bits we've assembled so far:

Wednesday, February 9, 2011

Oil Rig Build Log - Part 3

Making progress! We've got it to a point where it's definitely playable terrain, but still needs some work.

Before we move on to the build report, a couple of interesting notes:
 Upside down it would make some totally awesome  terrain for Battletech!
 Also, it's built like a tank! Here we're using two tubs full of Lego to weigh it down while the glue dries. Lego aint light! (Yeah, Pete's got a ton of Lego. Plus check out that carpeting!)

Okay, back to the build! This round, we decided on and built the upper deck layout, mounted the support columns for the cranes, and tried out the helipad.

This was done on Saturday. Since then, we've been moving forward on some of the cover and loose terrain bits. Pete's put together some nice real wood pallets (1" x 1") and some crates:
I decided to scour the internet and start purchasing some of the more difficult to obtain items. In particular:

  • The oil derrick. This is going to be tricky. Not only is it the biggest and most recognizable feature of the the project, but there are very few pre-built ones in a scale close enough! We decided to go ahead and order the Plastruct Electrical Towers & Oil Rig Kit from Hobbylinc. It came in today. However... the oil rig kit looks... a little... small. The girder bits are small and the base is only about 4" across. The instructions are almost useless, but the drawings are worthwhile. It might be useful to try building it as-is with the same philosophy as the cardboard mock-up.
  • Forklifts. After some extensive searching, I found some roughly 1/64 scale die-cast forklifts made by Welly toys and bought two red ones off eBay for $5 each. They arrived today as well. The forklifts are pretty neat and look in-scale. They come with cheap plastic pallets that are 1" x 1 3/8", so Pete's should work fine.
  • Winches. We are contemplating building winches from scratch, but seeing how work-intensive this project will be, we are weighing the price-to-work savings of some kits or pre-built parts. In this case, I found a Tugger Winch kit across the pond in the UK. I've sent them an e-mail for a quote, but it's looking like they'll end up being around $10 each. And we're talking about needing SIX...
P.S. We got the quote back - a $70 total. Looks like we'll be scratch-building them...

Wednesday, February 2, 2011

Oil Rig Build Log - Part 2

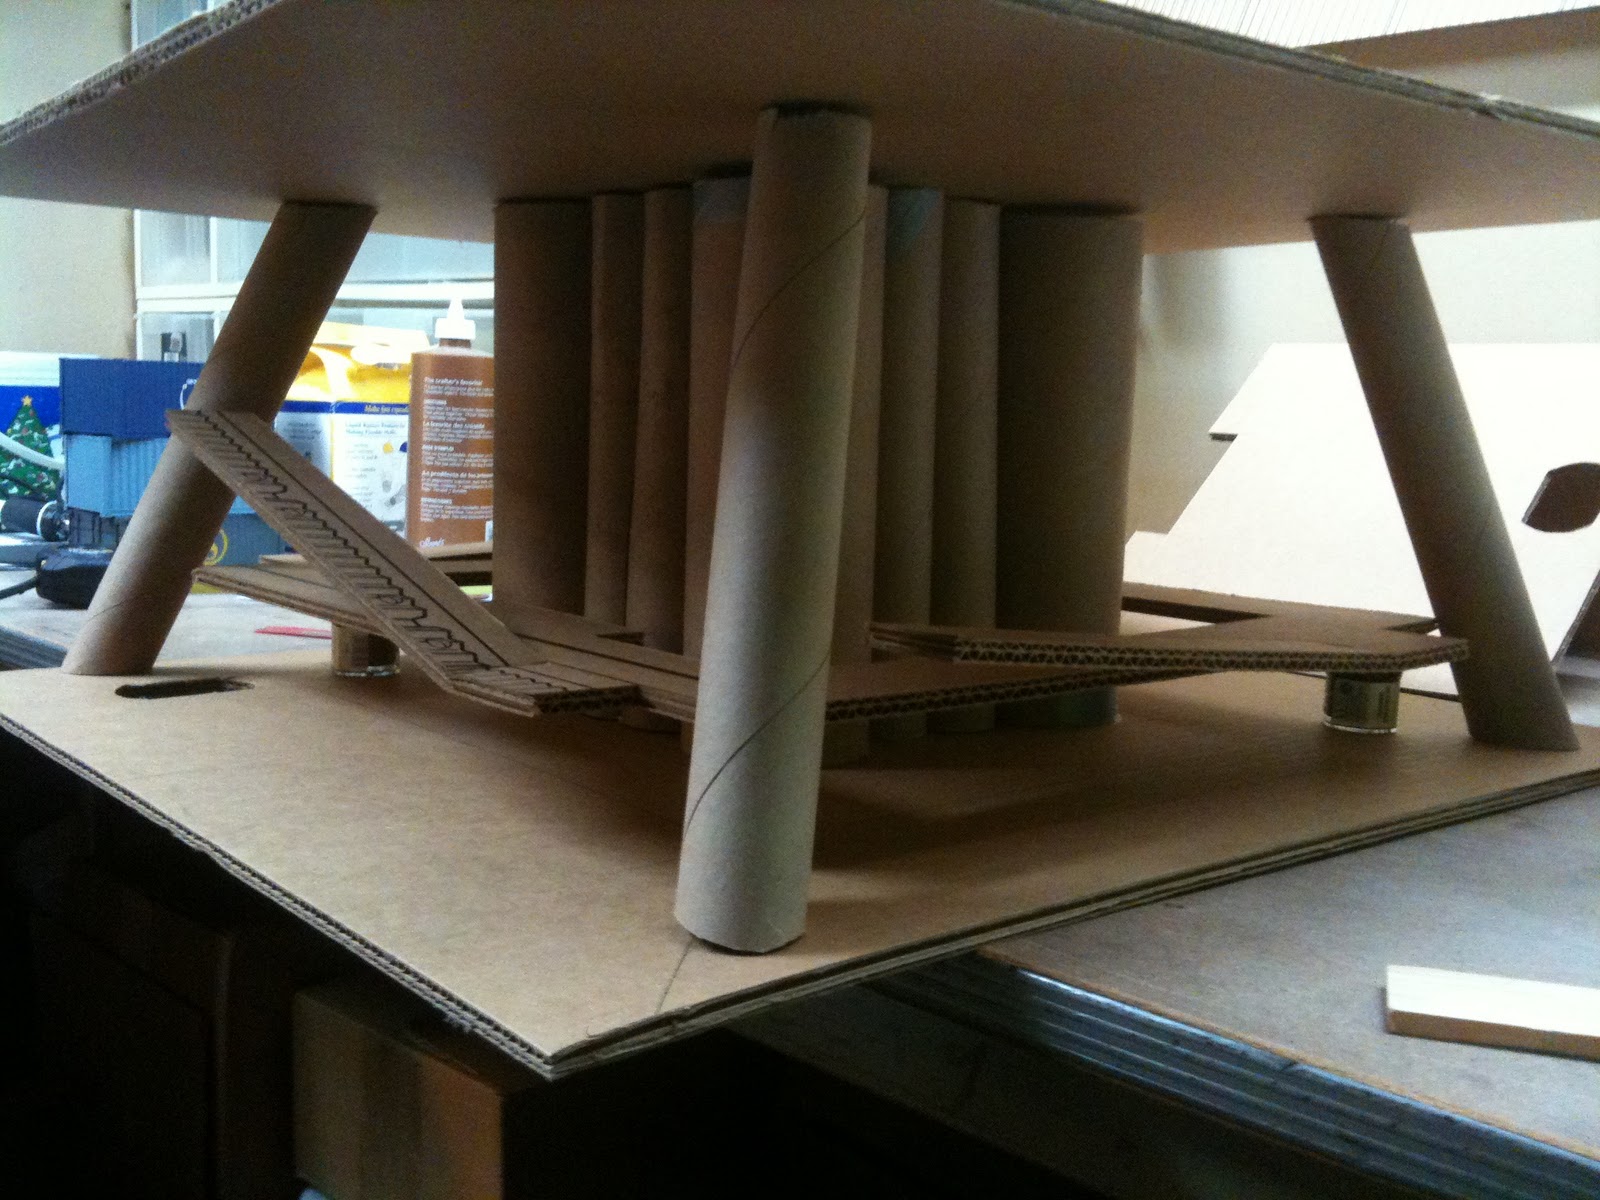
This past weekend, Pete and I were able to bang on the project and push forward. We now have the catwalk section and lower deck all glued together. We also cut 5" wide strips of cardboard to make the center structure. We decided to put in several alcoves to provide some sort of cover for the miniatures to duck into. You can see what I'm talking about here:


Obviously, the cranes have arrived and really give the project a sense of scale. We are using styrofoam and shoe boxes as placeholders for the next phase. In preparation for that, we have started doing some research into 1/64 or S-Scale modeling supplies. I have gone ahead and put in an order for a Plastruct Electrical Towers & Oil Well Kit. I'm curious to see how involved building a derrick from scratch will be...

Friday, January 28, 2011

Oil Rig Build Log

As I had previously mentioned, Pete and I are in the process of building a miniature scale oil-rig for use in tabletop wargaming.

Many years ago, I ran a Cyberpunk game session that took place primarily on an off-shore oil rig. Pete and I thought it would be fun to build a scale model of that oil-rig. We took that a step further and thought it should be playable terrain.

Our first step was to cut cardboard blanks (currently 24" x 24") to get a feel for the scale:
(Okay, this wasn't the FIRST attempt, but, alas, I lost those images in a phone shuffle...)

Actually, our first step was to try out a few sci-fi tabletop miniature games. We looked into:
  • AT-43 - Although I have a slew of AT-43 miniatures, we never got around to playing as we did not want to purchase the rulebook for a "test" game and the rule summary I found was useless as it expected you to have the book. (Also, it looks like they are now discontinued...)
  • Infinity - The rules are simple in theory and provide a nice defense/response mechanic, but once you start adding in all the weapon and special ability rules it becomes daunting.
  • Rezolution - Nice simple rules. Possibly TOO simple.
We ultimately decided to go with Infinity due to its defense/response mechanic.

Shortly after, we were invited to participate in an Infinity game by a fellow we met at Fair Game. We enjoyed ourselves immensely and, in discussion with the host and other players, discovered some interesting notes:
  • Infinity requires a LOT of terrain. It's pretty deadly otherwise.
  • Usually, a field of play is 4' x 4', however... 2' x 2' x 2' is doable.
Based on our experience, we decided to go ahead and upgrade from "get a feeling for the scale" to a playable cardboard mock-up. Hopefully we can get it done by the next Infinity game and ask the gents to try it out so we can get even more feedback.

Here's where we got so far:


Quite exciting!

I have also gone ahead and ordered two remote control(!) cranes from Hobbytron. The scale is a bit on the big side, but they are awesome and may just add that extra oomph!